

Have you ever found yourself staring in the mirror, debating whether to spend two hours on your hair—or throw it up in a messy bun and hope for the best? I’ve been there more times than I can count. But over the years, I’ve discovered one hairstyle that’s not only ridiculously easy but also versatile, cute, and long-lasting. It has carried me through nursing school clinicals, camping trips in the mountains, flights and road trips, days at the gym, and even those “dirty hair” days when washing it just wasn’t in the cards.
And here’s the best part: it takes less than five minutes to do.
This hairstyle started as my “dirty hair day” fallback. You know, that look you pull together when you want to look like you tried without actually putting in the effort? But the more I wore it, the more I realized—it wasn’t just a backup plan. It became my favorite go-to style, one that got me more compliments than any other hairstyle I’ve ever worn. People constantly ask how I do it, and now I’m sharing the step-by-step process (with a video to make it even easier) so you can try it, too.
Why This Hairstyle Works for Real Life
Before we dive into the “how-to,” let me explain why this hairstyle is such a game-changer.
1. It Lasts for Days
When you’re camping, traveling, running from one nursing lecture to the next, or juggling gym sessions with real life, you don’t always have the time—or energy—to redo your hair daily. This hairstyle can last through multiple days, evolving into different looks as the week goes on.
2. It’s Low-Maintenance
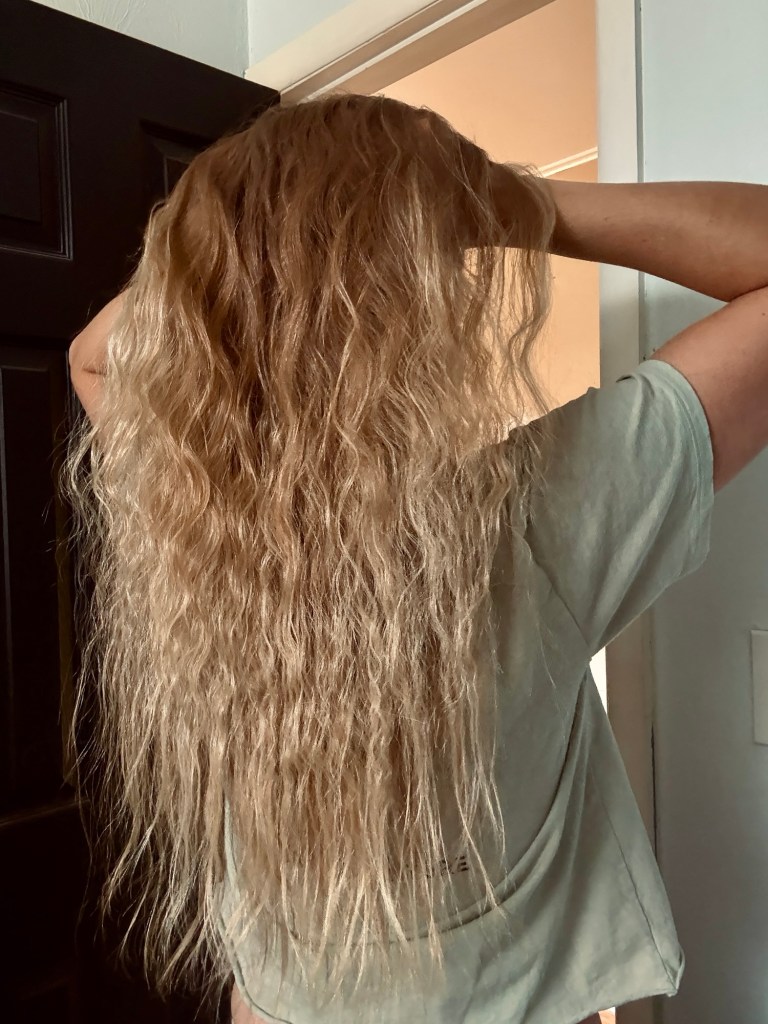
I have long, fine hair that reaches the middle of my back. I try to take good care of it, which means less heat and chemicals, and more leave-in conditioner, air-drying, and gentle products. I only wash my hair about once a week. With this hairstyle, I don’t need curling irons, blow dryers, or endless sprays of hairspray.
3. It’s Comfortable
I love that this hairstyle doubles as my favorite sleep-in style while camping. When my hair is in twists, I can wear a beanie without rolling all over my hair or waking up with tangles. The next morning? I’ve got soft, natural curls that feel effortless.
4. It’s Versatile
You can wear this style as:
- A polished twisted bun
- Loose, wavy curls the next morning
- A casual ponytail with texture
- A messy bun with volume
- Down with a hat or beanie
- Braided for extra hold overnight
In other words, one five-minute style gives you multiple looks throughout the week.
5. It’s a Traveler’s Dream
This is the hairstyle I recommend most when traveling—whether you’re backpacking in the mountains or trying not to go over the weight limit at the airport. Why? Because you don’t need to pack a curling iron, flat iron, or blow dryer.
Every ounce matters when you’re carrying your own pack, and every pound counts when you’re checking a suitcase. Hair tools are not only heavy but also bulky, and who really wants to deal with adapters and outlets when traveling abroad?
With this style, all I need is:
- A travel-sized leave-in conditioner
- A couple of elastics and bobby pins
- A mini hairspray bottle
That’s it. No tools, no cords, no extra weight. Just one hairstyle that adapts for a week’s worth of different looks.
My Hairstyle Routine
Here’s a peek into how I personally use this hairstyle throughout the week:
- Day 1: Twist buns with light non-hardening hairspray. Perfect for traveling, running errands, working, or a night out. Don’t forget to leave in the twists overnight!
- Day 2: Take out the twists for soft, “crispy” curls. I’ll add rosemary oil to the bottom half of my hair for shine and scalp health. Wear it down, throw it in a ponytail, or add a beanie.
- Day 3-4: Refresh with a quick twist bun or braid at night. Wake up with refreshed curls.
- Day 5+: Use it as a base for a messy bun or braid until it’s time to wash.
If I do shower mid-week, I’ll put my hair up in a bun to keep it dry. Sometimes, I’ll rinse with conditioner only (no shampoo) before putting it back into the buns. If I shower right before bed, I’ll braid the bottom section instead of twisting it, since braids hold better for me overnight.
Step-By-Step: How to Create the Twist Bun Hairstyle
Here’s the detailed guide (and don’t forget to watch the video for a visual walkthrough):
What You’ll Need:
- Leave-in conditioner (spray works best)
- A clear elastic hair tie
- A few bobby pins
- Non-hardening hairspray
Steps:
- Prep Your Hair
- Spray your hair lightly with leave-in conditioner. This keeps it soft, manageable, and prevents breakage while twisting.
- Part Your Hair
- Separate your hair straight down the middle.
- Start the Twist
- Take a two-inch section where your bangs or “money pieces” are.
- Wrap the two sections of hair around one another.
- Add More Hair
- With the bottom piece, grab more hair from the side and continue twisting.
- Keep doing this until you reach just above your ear.
- Pull Out the Wisps
- Gently pull out a few cute wispies in front of your ear for a softer look.
- Secure the Section
- Use a clear elastic hair tie here. This step makes the bun process way easier.
- Create the Bun
- Twist the hair until it naturally coils into a bun at the lower back of your head.
- Secure with bobby pins as necessary.
- Finishing Touch
- Spray lightly with non-hardening hairspray to hold everything in place without making it stiff.
The Braided Version (for Overnight Hold)
If you don’t have time to let your hair dry in the buns throughout the day and want a version that still holds while you sleep:
- After pulling out your wispies, start braiding instead of twisting.
- Incorporate the rest of your hair as the third piece of your braid, starting with the section you just added.
- Work your way down and secure with a clear elastic.
- Once secure, pull at each side of your braid to make it slightly looser
- The next morning, your curls will be slightly different—tighter and more defined.
Hairstyles You Can Create From This Base
The beauty of this style is that it’s not just “one look.” Once you take down your twists or braids, you’ve got a whole week’s worth of hairstyles ready to go.
Here are some of my favorites:
- Loose Waves – Natural, soft, and perfect for a casual day or night out.
- Textured Ponytail – Tie your hair back for the gym or errands. The added wave gives your ponytail volume and life.
- Messy Bun – Perfect for travel days, work, or a coffee run. Takes under 2 minutes.
- Beanie or Hat Look – Your hair has natural texture underneath, so a beanie or hat looks intentional and stylish instead of “covering dirty hair.”
- Half-Up, Half-Down – Use the waves to create a chic half-up style with a clip or small elastic.
Real-Life Situations Where This Hairstyle Shines
I truly believe this hairstyle works for almost everyone, no matter your lifestyle. Here’s where I’ve personally loved it most:
🌲 Camping & Outdoor Adventures
“When you’re in the mountains, the last thing you want is to waste time styling your hair.”
With this style, I wake up, take down my twists, and instantly have a look that works under a beanie, in a braid, or left loose.
👩⚕️ Nursing School & Work
Between clinicals, long classes, and back-to-back shifts, my hair is the last thing I want to stress over. This style helps me feel put-together with minimal effort.
🏋️♀️ At the Gym
Sweating? No problem. The buns keep my hair secure, and after, I can take them out for waves or throw it in a ponytail.
✈️ Traveling
This hairstyle is made for travelers. No hot tools. No heavy products. No stress. Just twists, braids, and a mini hairspray. Your pack (and your checked bag scale) will thank you.
💼 Everyday Life
Errands, coffee dates, even dinner out—this style has me covered without the fuss.
Tips for Different Hair Types
While I have long, fine hair, this style can be adjusted for almost anyone.
- Shorter Hair: Try twisting just the front sections into mini buns or braids.
- Thicker Hair: Use stronger elastics and extra pins for hold.
- Curlier Hair: This will enhance your curls—try the braided version for more definition.
- Straighter Hair: Use a little texturizing spray before twisting for grip.
- Finer Hair (like mine): Don’t skip the leave-in conditioner—it prevents tangles and breakage.
And remember, I’d love to help! If you have questions about your specific hair type, feel free to reach out in the comments.
Words to Remember
Sometimes, it’s not about looking perfect—it’s about finding little hacks that make life easier and help you feel confident.
“Feel good about yourself without feeling like you have to take two hours to do your hair.”
This hairstyle is proof that looking good doesn’t have to be complicated.
Final Thoughts
What started as my “dirty hair day” hairstyle has turned into my favorite go-to look for almost every situation. It’s quick, easy, versatile, and makes me feel put together—even when life is hectic.
Whether you’re hiking mountains, rushing to the airport, traveling abroad, running to nursing school, or hitting the gym, this style can carry you through. Give it a try, and let me know how it works for you—I think you’ll be surprised how much freedom and confidence comes from finding that one hairstyle you can always count on.
And don’t forget to check out the how-to video included with this post—it’ll make everything even easier to follow along.
💬 Your turn!
What’s your go-to hairstyle for busy days or when you’re traveling light? Share in the comments—I’d love to hear your tips and tricks!

Leave a comment